
 Being on a tight budget, like many families, I try to reuse as many pieces of clothing as possible for multiple kids. Very often kids will outgrow an article of clothing long before they trash it. Not so in the case of Dimples and his jeans. He is a knee buster and has torn through the right knee of nearly every pair of pants he as worn since he was about 2. This has left me with many pairs of pants, where the only thing wrong is a hole in the knee. For four years I have held on to these, not exactly sure what to do with them, but not wanting to throw them away. I also didn’t want to give them away, because who wants a holey pair of jeans?
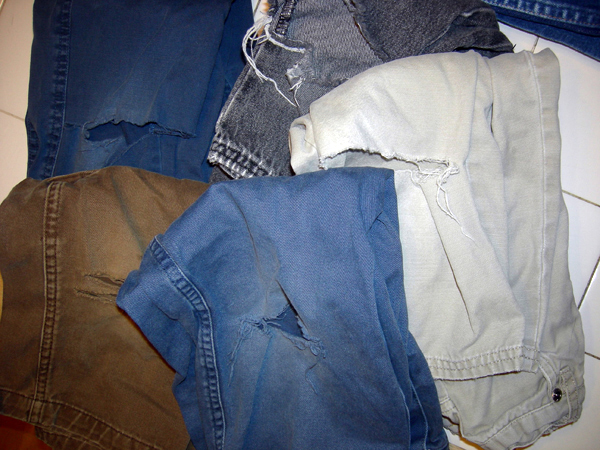 So when Cricket needed new jeans, I started searching online (because who wants to browse at a store with three kids in tow?) and found that, yes, people do want holey jeans and apparently will pay ridiculous amounts for jeans with a worn look. I finally figured out how to salvage all those holey jeans and outfit Cricket for the winter with little to no money spent on doing so. I am going to try to make this a tutorial of sorts, because I know others out there might want to try the same thing.
I pulled out six pairs of jeans that would fit Cricket with a cinch of the waist and a few folds of the bottom cuff. I also pulled out 5 pairs of smaller jeans that I could use as patch material.
I asked Cricket what color he wanted and he said yellow. It is his favorite color. I choose to make a patch from the black jeans, because I have yellow thread that would show up well.
 The first step is to clean up the hanging threads on the jeans that need to be patched. I just clipped off the longest threads. Next I cut a patch out of the black jeans that would fully cover the hole. I didn't want this to look too "done" so I didn't measure or even make sue that the rectangle was even. I also didn't leave extra material for turning under edges for two reasons. One, trying to sew through 3 layers of denim (one for the jean, two for the turned seam patch) would likely break my needle. And two, I wanted the edges to fray with washing, giving it a look like all those expensive, designer jeans.
  Now you could hand sew the patch on, but with small jeans like this, even that will be tricky. I prefer machine sewing, so I had to open up a seam. From what I can tell, there are two different types of seams on a pair of jeans. There is your "typical" seam, where no stitching shows, and the "jean" seam where you see the top stitching, often done in yellow. Which side the typical seam is on varies. For instance, the pair of jeans I am wearing while typing this has the typical seam on the outside, but the pair used for this post has it on the inseam. It is the typical seam that you want to open up, otherwise you will need to match up the thread used for the top stitching.
  Turn the jeans inside out so you can easily get to the seam. Get out your seam ripper and open a hole that is large enough for you to move around, but avoid opening it all the way to the bottom hem. It will be harder to close if you have to deal with the bottom hem as well. Start small at first, you can always open it further if needed. If you don't have a seam ripper, you need to get one. I consider it to be one of the most important items in a sewing kit, regardless if you are a master sewer or just patch things here and there.
Time to attach the patch. This is where your own style and creativity comes in. You can use a straight stitch like I did, or a decorative one. You can also use any color you want. It is up to you. I recommend pinning the patch on so it is not moving around. My original idea here was to have a bunch of lines across the patch, to show off the yellow. After I had the patch attached, I noticed some scraps from a school bag that I had made Cricket several months ago. Since he had picked out that fabric himself, I decided to add a small piece, for more even more yellow. I didn't hem this piece either, because I wanted it to fray with time. A couple of lines later and I was finished.

Now to close up the seam again. Because the stitching was not going to show, I didn't bother changing my machine bobbins. When I took apart the seam originally, I saw that there were two lines of stitching. One straight and one overlock. I don't have an overlock/serger machine, so I had to settle for a straight stitch and a zig zag. It's not perfect, but it works.And now you are all done! Turn the jeans right side out and try them on.

Cricket seems to like his new patch. This is actually the second pair that I have patched for him, so he is starting to get used to his "special" jeans.
 You may have noticed that the title of this post says Part 1. That is because I am also in the process of re-working jeans for the other two kids. For Dimples, I am re-working two pairs of his sister's old jeans. I am not sure yet exactly what I will do, but I will post once figure it out. For Freckles, she has a large number of jeans that are just one size too small for her. My plan there is to take out the outside seam and add fabric to increase the size. A post on that will also be put up once it is finished.


